 この記事にはプロモーションが含まれていることがあります
この記事で紹介した通り、Windows7のサポートがもうすぐ終了します。
つまりWindows7が実質使えなくなります。
みなさん、Windows10への乗り換えは順調でしょうか?
Windows10はUIがなんか嫌い… 勝手に大幅な修正モジュールが適用されて調子が悪くなるのが嫌だ…等、Windows10に乗り換えたくない方も一定いると思います。
Windowsを使い続ける以上、バージョンアップ時には新しいOSを購入する必要がありますので、今後も定期的にMicrosoft社に年貢を納めなければなりません。
それならば、Windows使うの止めたい!!
でも代わりに何を使うの?
はい、そこでZorin OSの出番です。
ZorinOSのインストール
Zorin OS は、Linux を簡単かつ円滑なアクセスできるようにする Windows ユーザーのための多機能のオペレーティングシステムです。
zorin os サイトのプロジェクトの概要より
Linuxには様々な種類がありますが、このZorin OSもその一つ。ただ、UIがWindowsに似ているため、Windowsユーザが乗り換えるには良いのでは!? と囁かれていますので、試してみましょう。
Zorin OSの入手
こちらの公式サイトから入手ダウンロードします。ちなみに公式サイトには、こう記載されています。

仮想マシンの作成
まずは仮想マシンを作成します。
Hyper-Vを利用したことのない方は、Hyper-Vを有効にしてHyper-Vマネージャーを起動してください。やり方はこちらの記事をご覧ください。
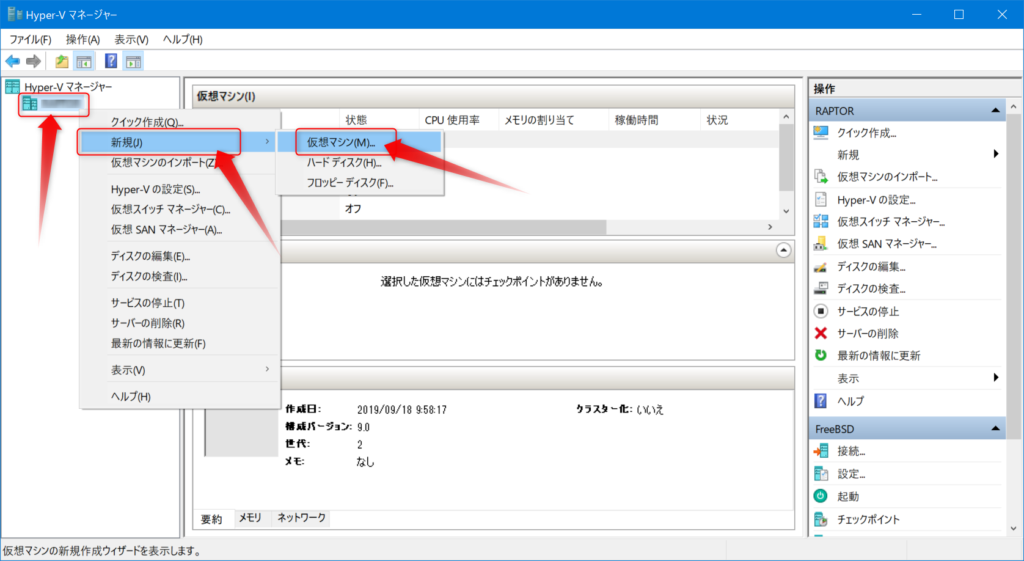
Hyper-Vマネージャーを起動し、左の一覧から本体PCを右クリックし、「新規」→「仮想マシン」をクリックします。
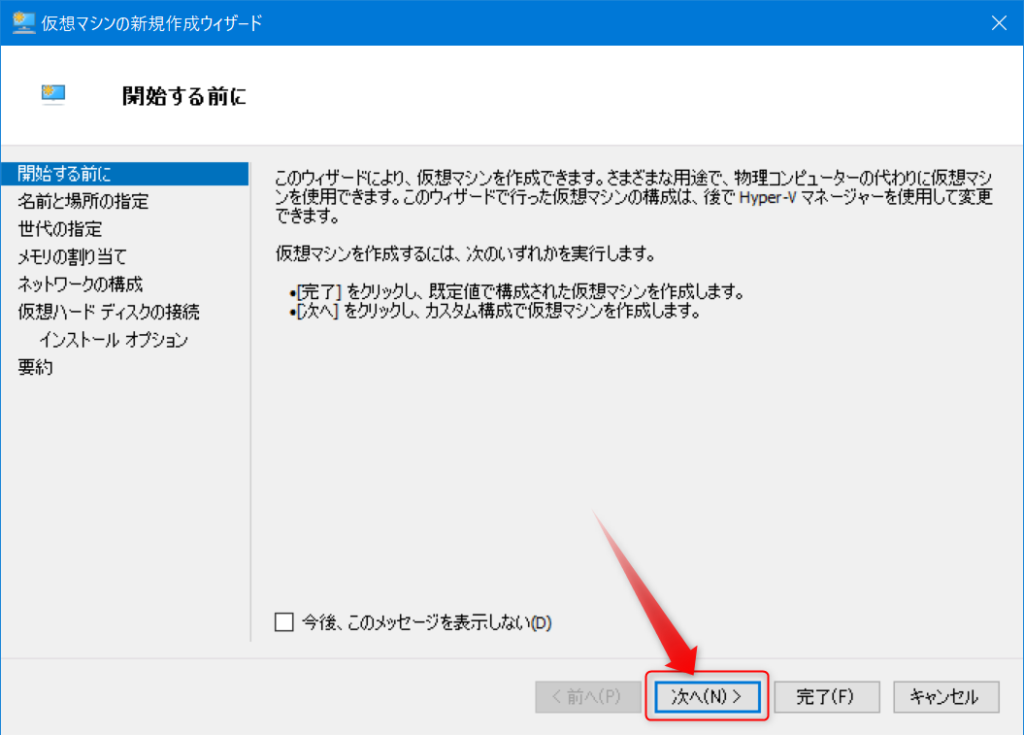
「次へ」をクリックします。
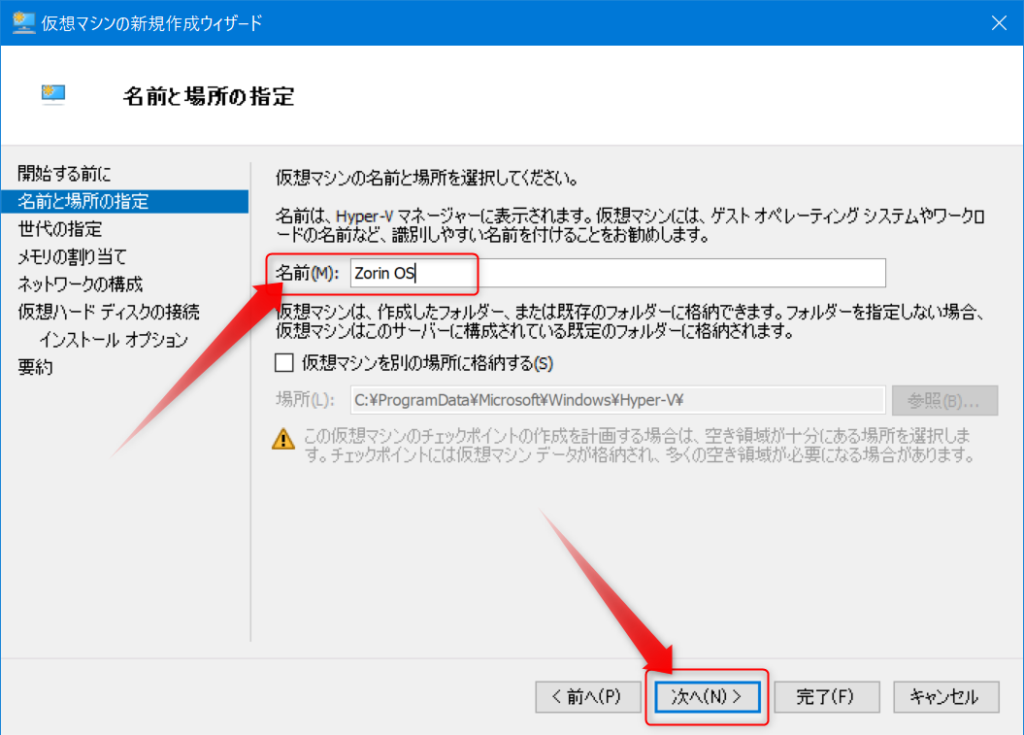
名前を設定し、「次へ」をクリックします。
名前は何でもよいですが、後で何の仮想マシンなのか分かる名前が良いと思います。
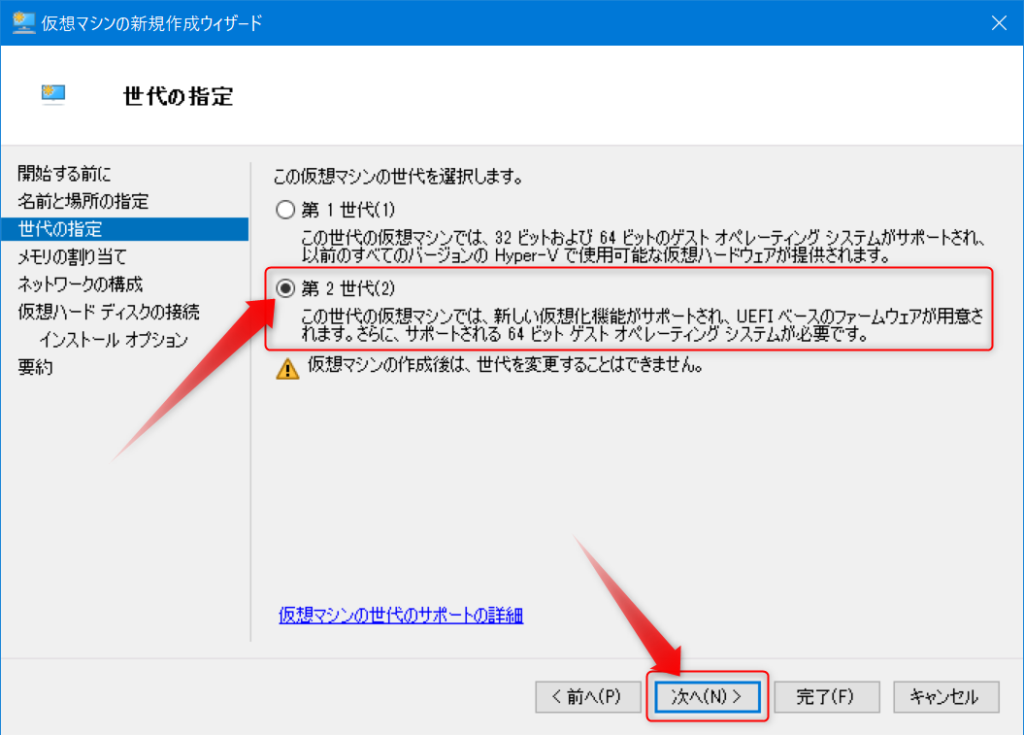
Zorin OSは第2世代に対応していますので、そちらを指定して「次へ」をクリックします。
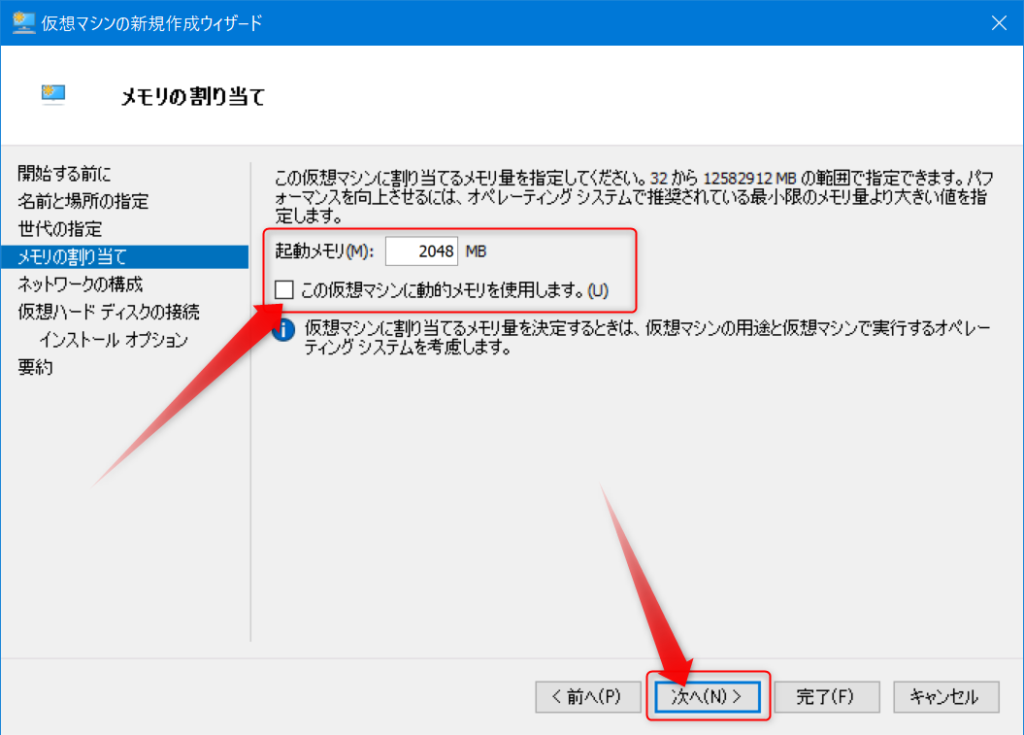
メモリは2GBを割り当てます。動的メモリは使用しないのでチェックを外したら、「次へ」をクリックします。
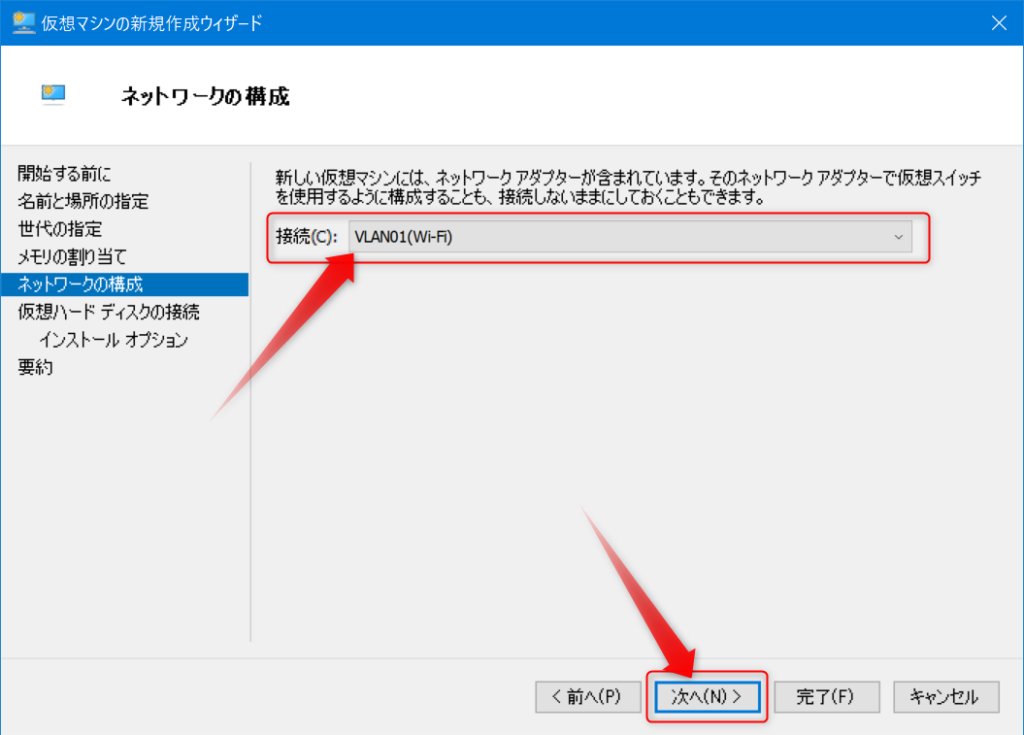
使用するネットワークカードを指定します。それぞれの環境によって異なりますので、外に接続可能なネットワークを選択してください。
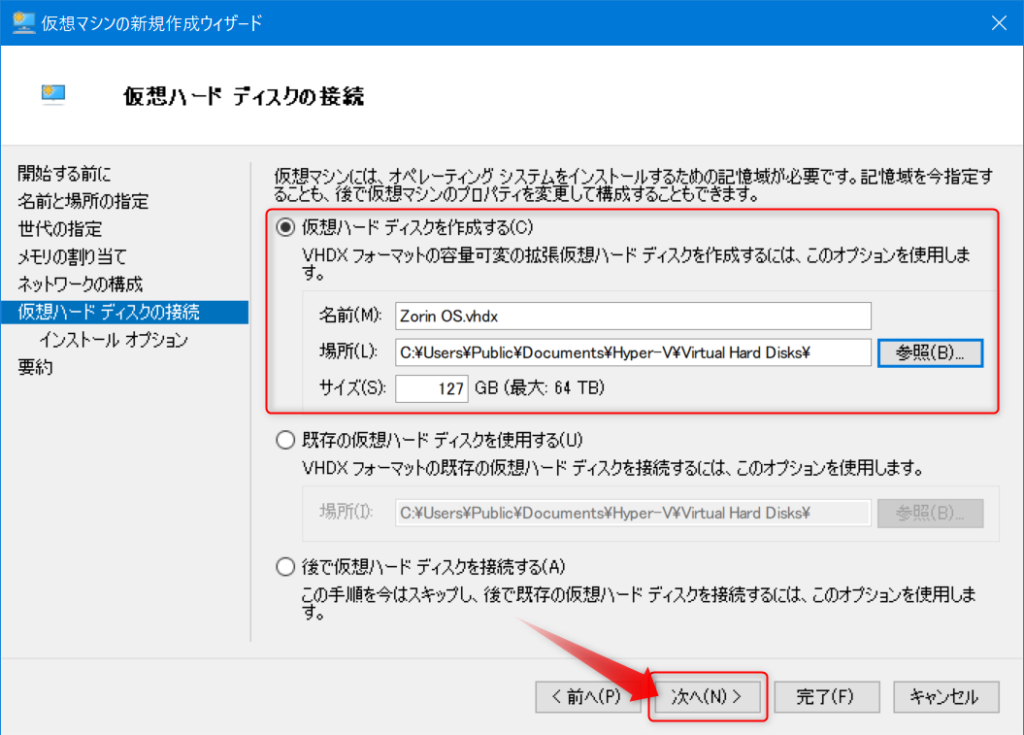
仮想ハードディスクは作成し、設定はそのまま特に変更は不要です。「次へ」をクリックしてください。

ブートイメージファイルからオペレーティングシステムをインストールする、を選択し、先程ダウンロードしたZorin OSのISOファイルを指定して「次へ」をクリックします。
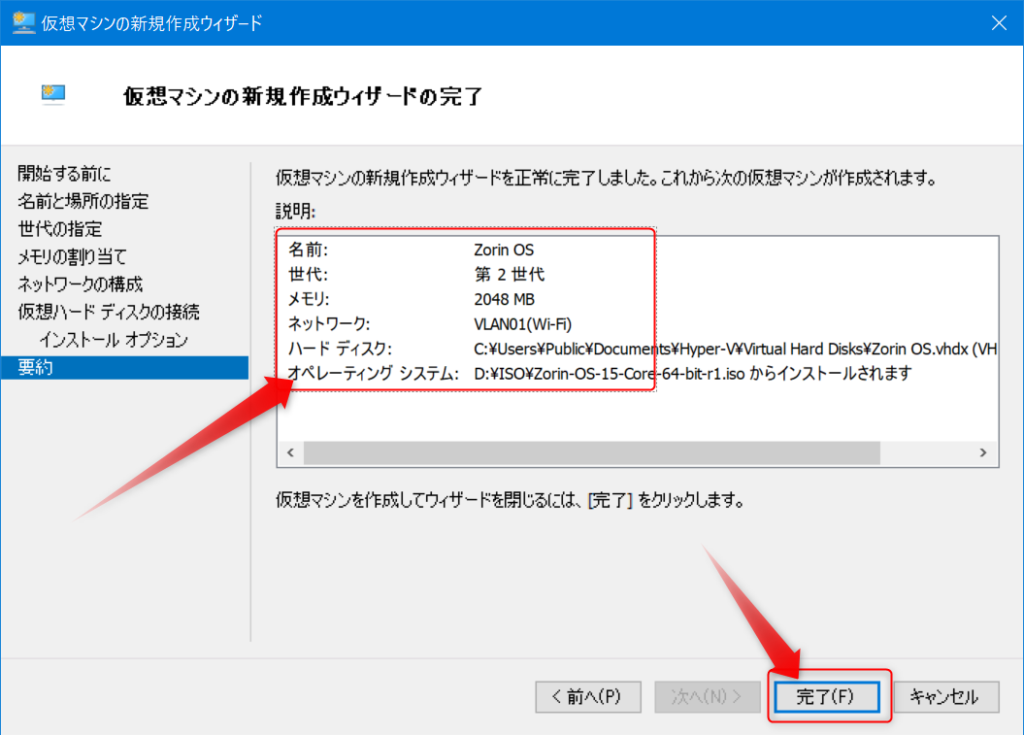
内容を確認して問題なければ「完了」ボタンをクリックします。
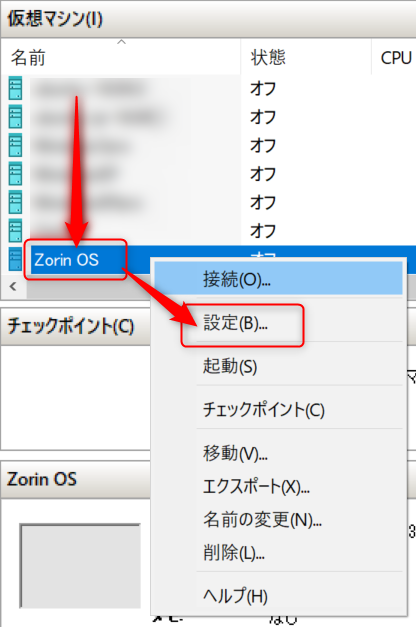
仮想マシンの一覧に追加されますので、右クリックして「設定」をクリックします。
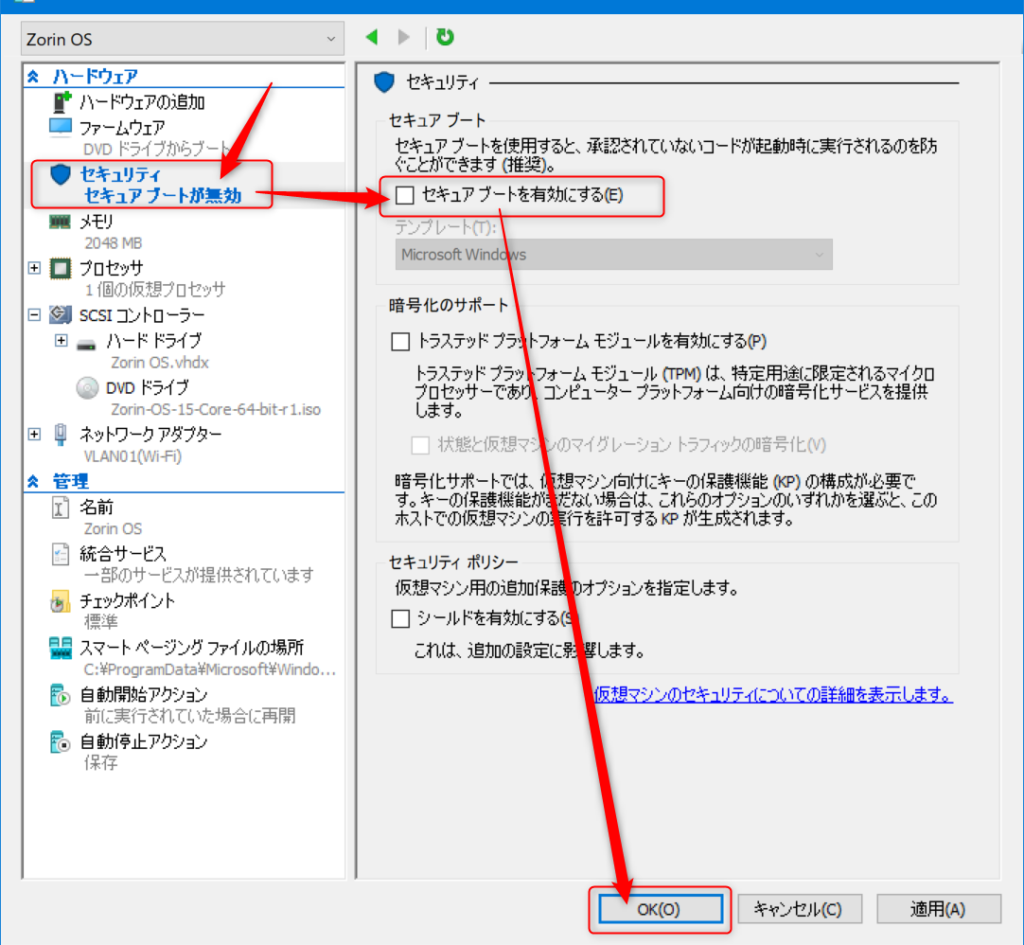
設定画面の左側の「セキュリティ」をクリックすると、右側がセキュリティの設定に切り替わりますので、「セキュアブートを有効にする」のチェックを外して、「OK」ボタンをクリックします。
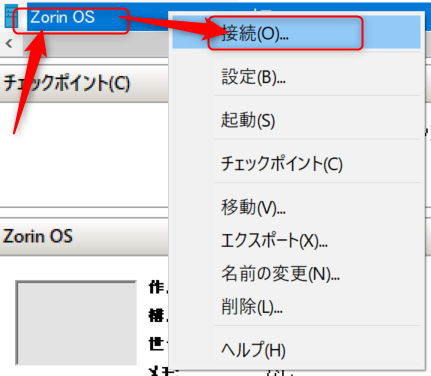
一覧から仮想マシンを選択して右クリックし、「接続」をクリックします。
Zorin OS のインストール
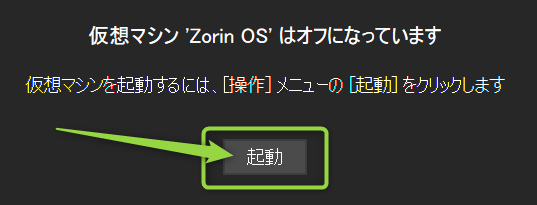
別ウインドウが起動しますので、「起動」をクリックします。
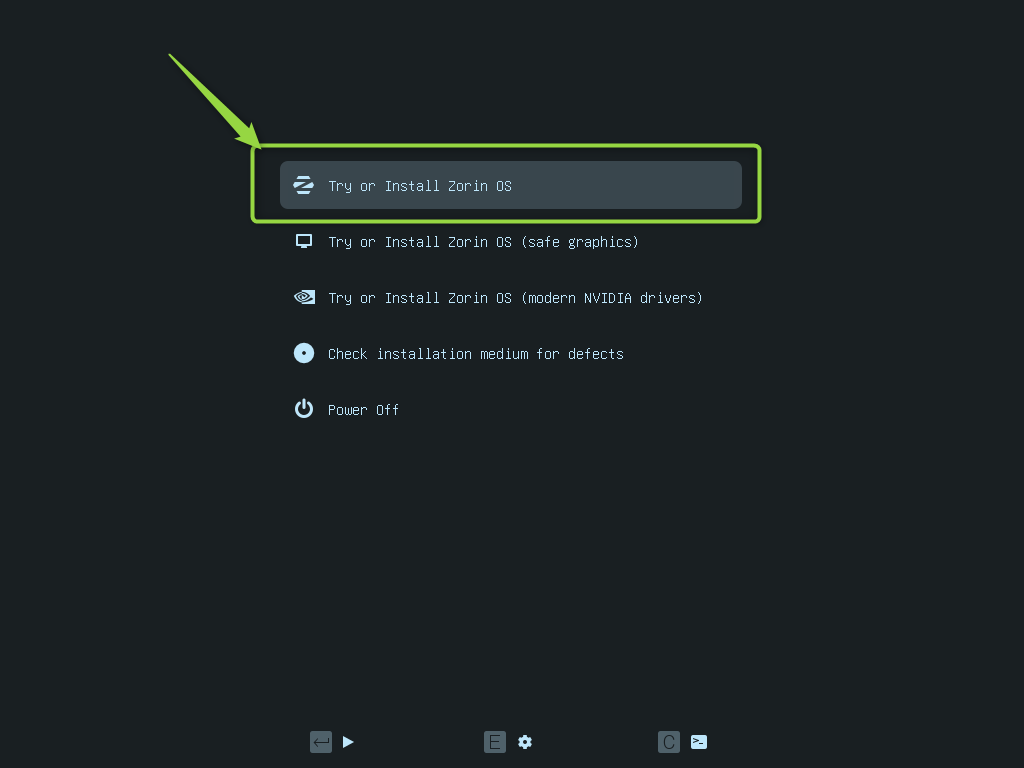
「Try or Install Zorin OS」をクリックします。
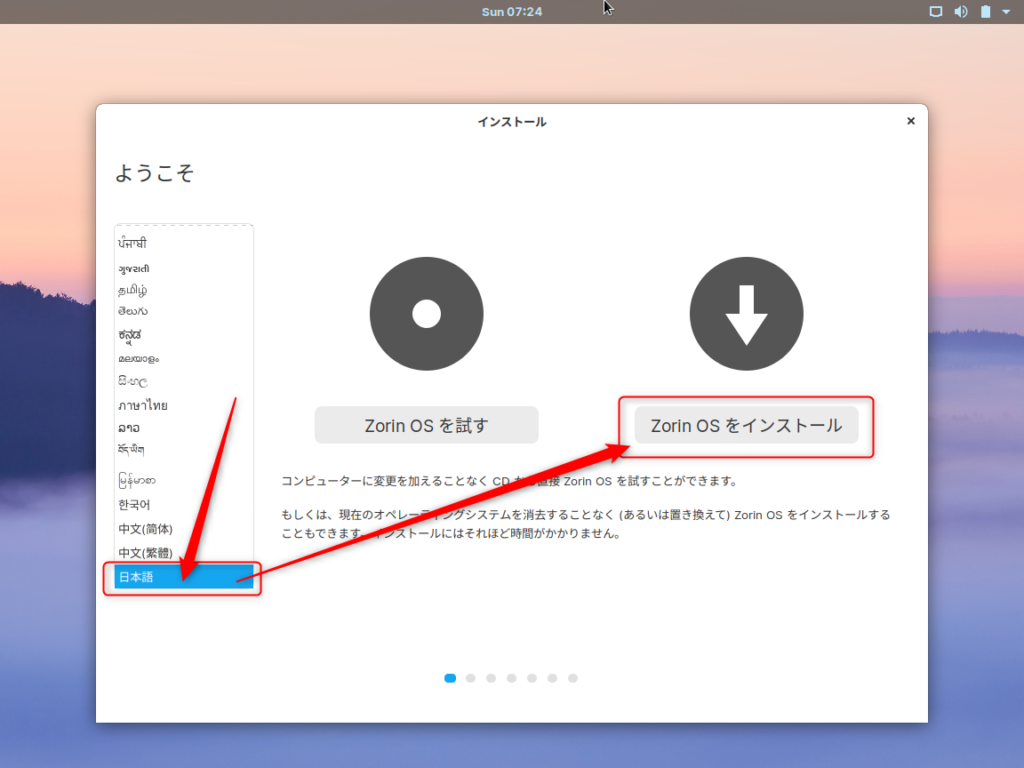
日本語を選択して、「Zorin OSをインストール」をクリックします。
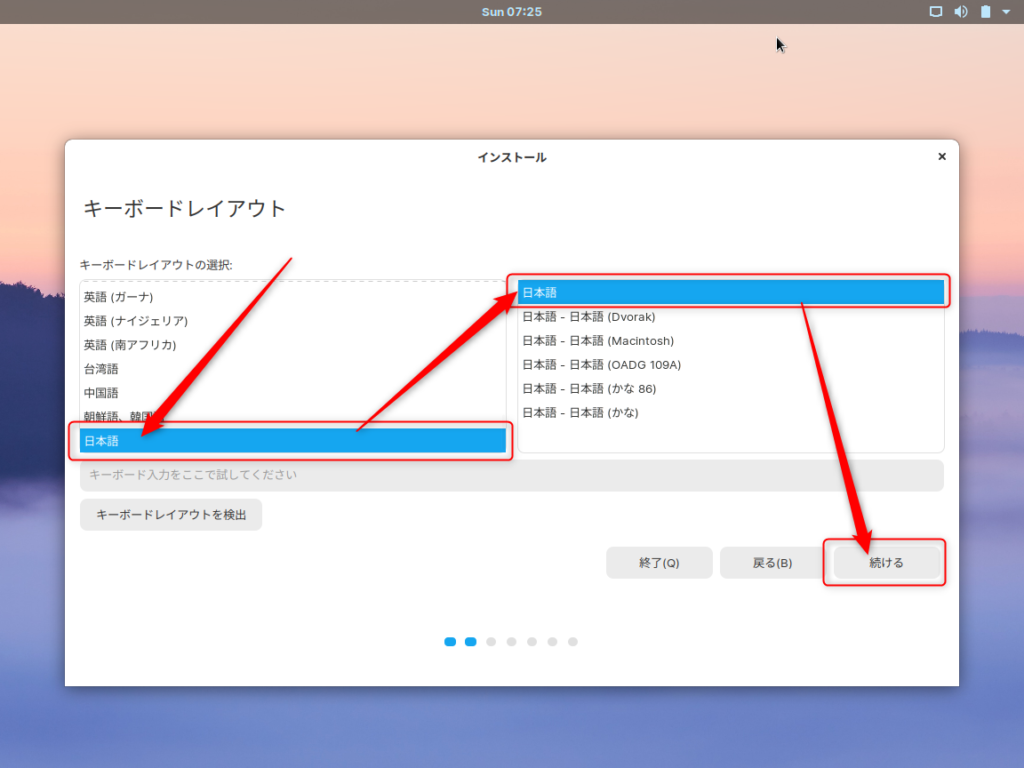
キーボードレイアウトも日本語を選択して「続ける」をクリックします。
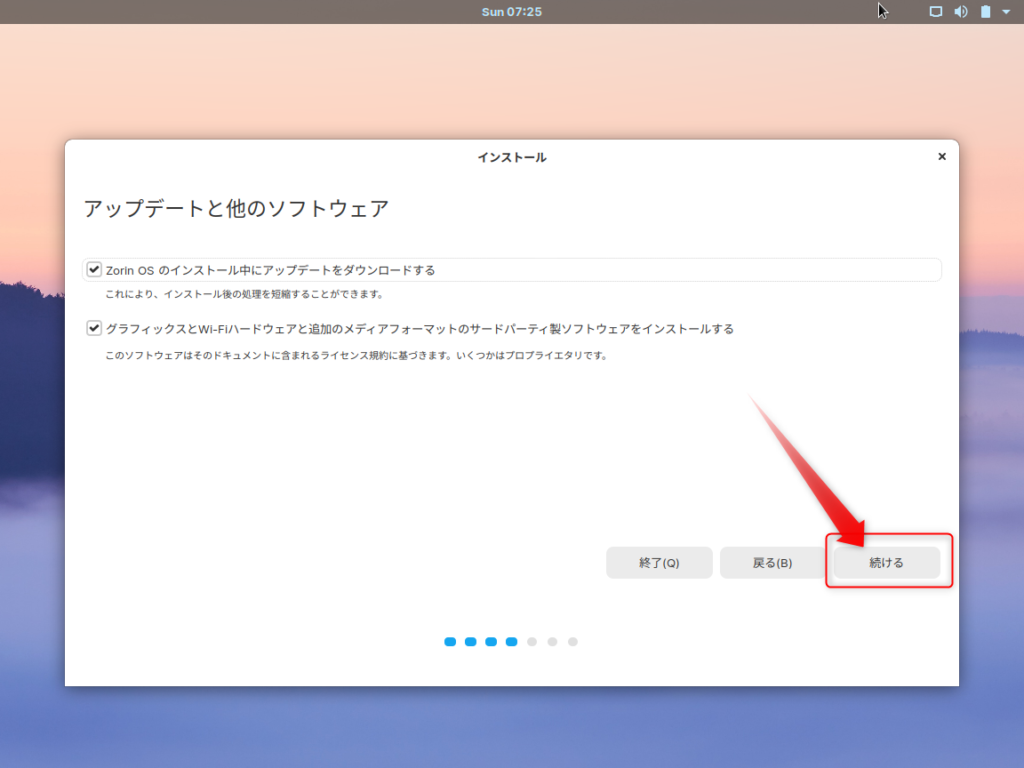
両方ともチェックを付けたまま、「続ける」ボタンをクリックします。
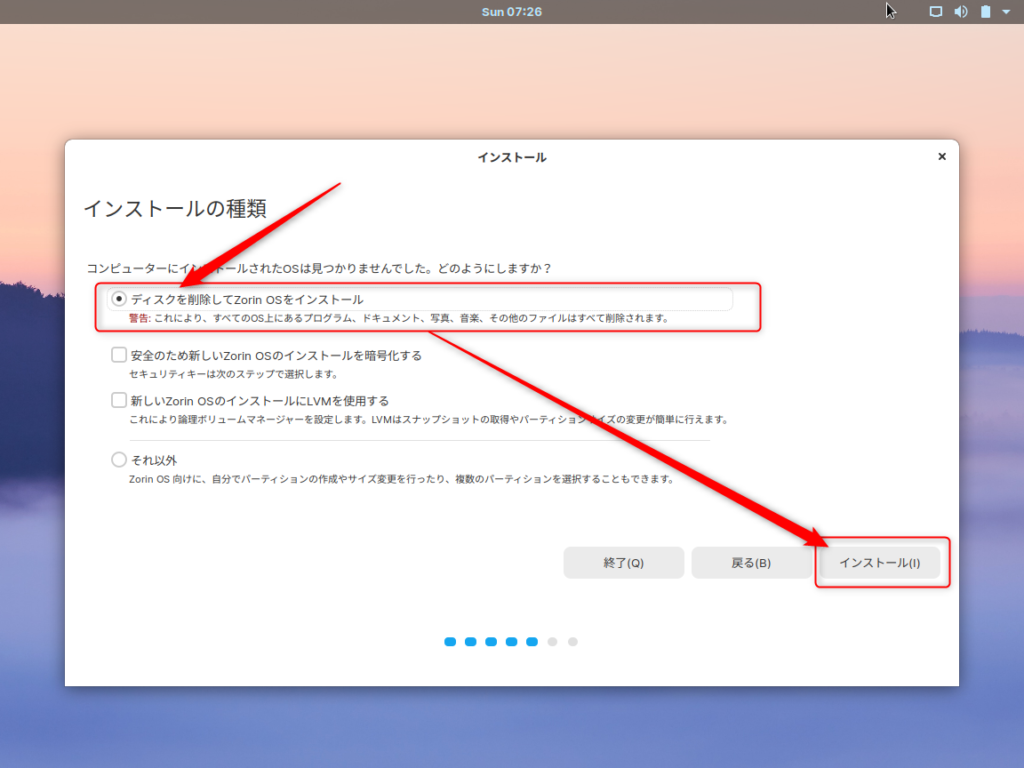
ディスクを削除してZorin OSをインストールを選択して「インストール」ボタンをクリックします。毎度のことですが、Hyper-Vの仮想マシン上にインストールする場合、警告は気にしなくてOKです。
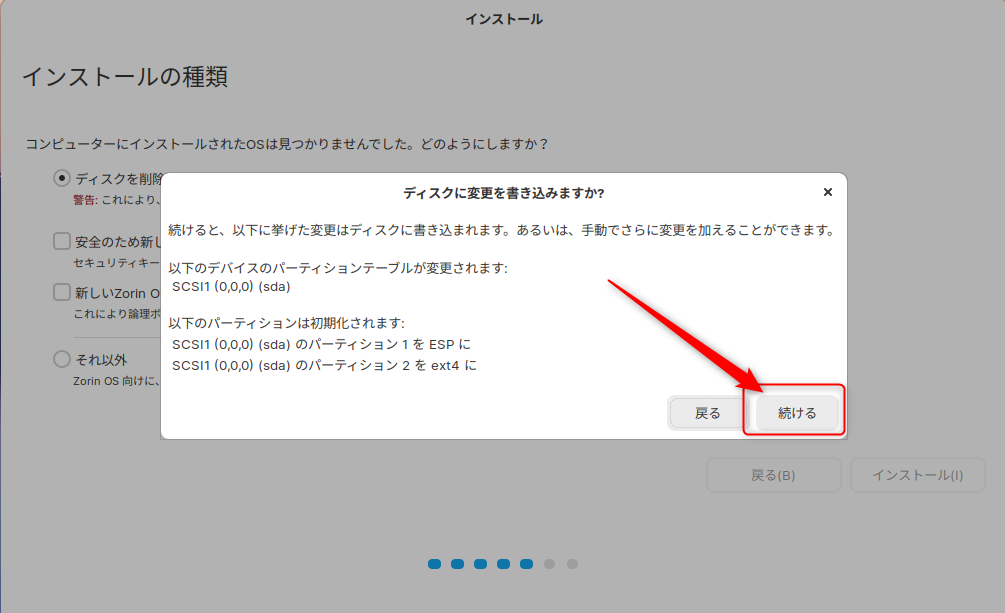
「続ける」をクリックします。
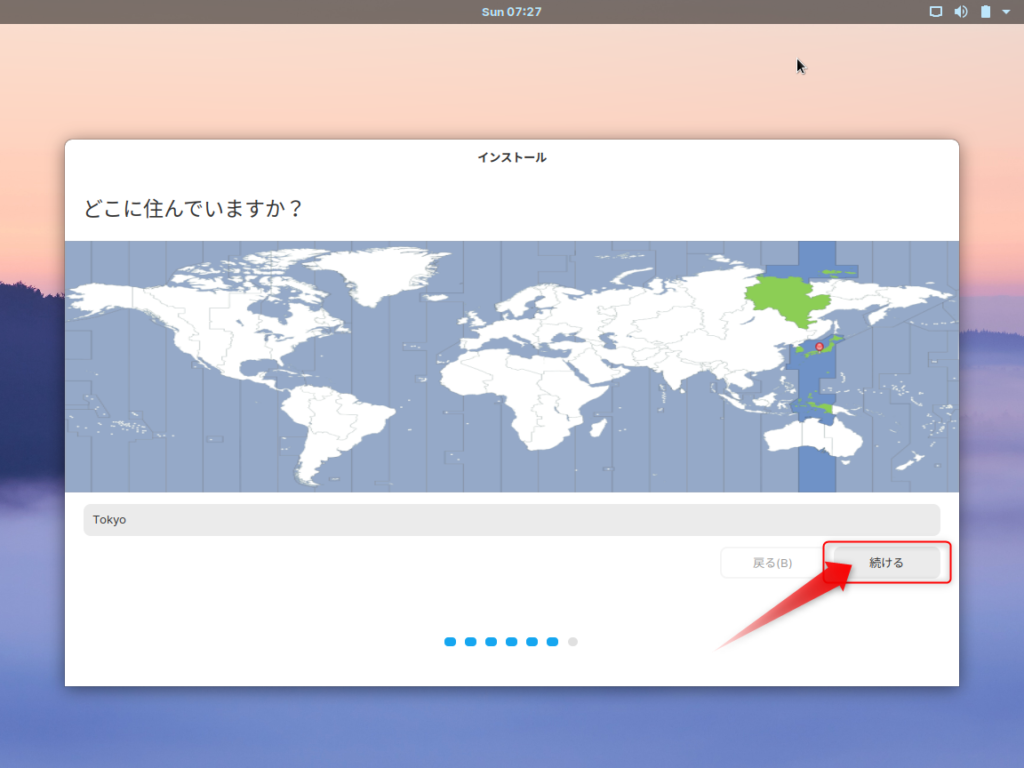
住んでいる地域を指定し、「続ける」をクリックします。
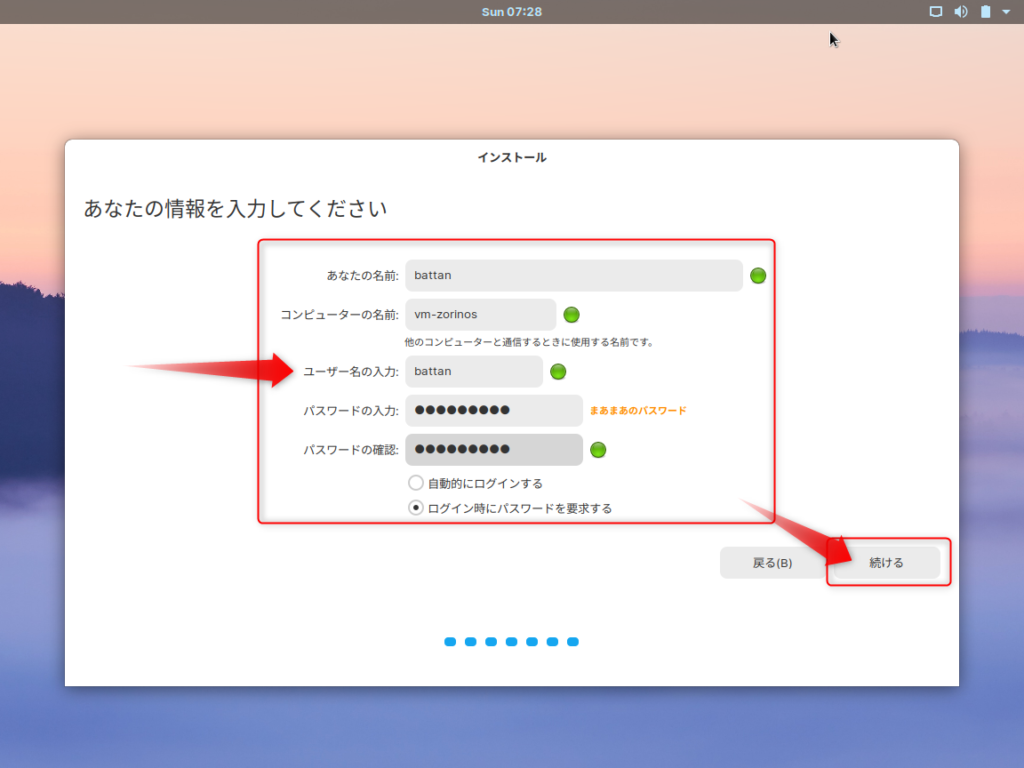
適宜入力します。自分しか使わない人は「自動的にログインする」を選択した方が便利かもしれません。入力が終わったら、「続ける」をクリックします。
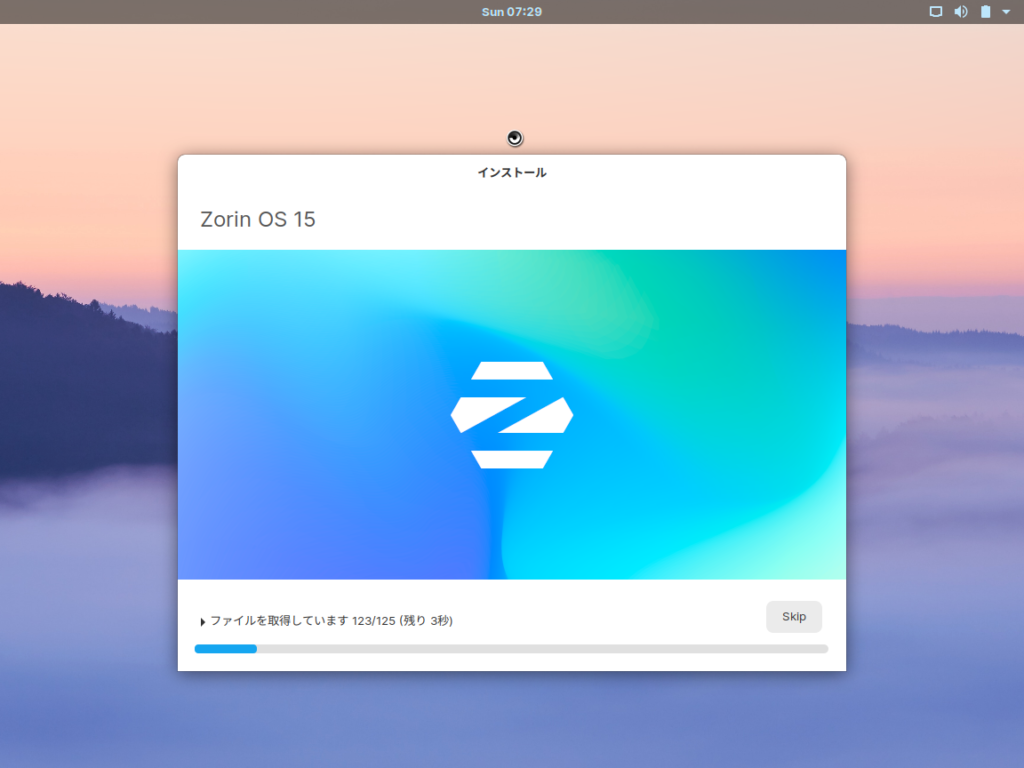
インストールが始まりますので、しばらくお待ち下さい。ちなみに私の場合は、6分ぐらいで終わりました。
ZorinOS起動
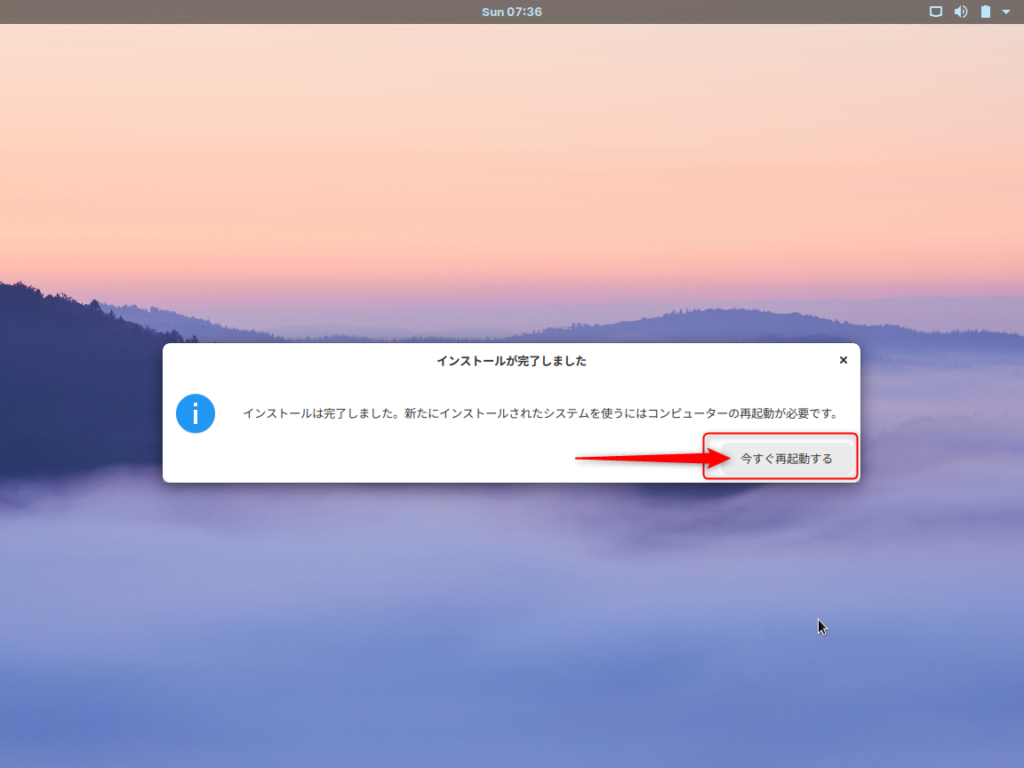
インストールが完了したら、再起動します。
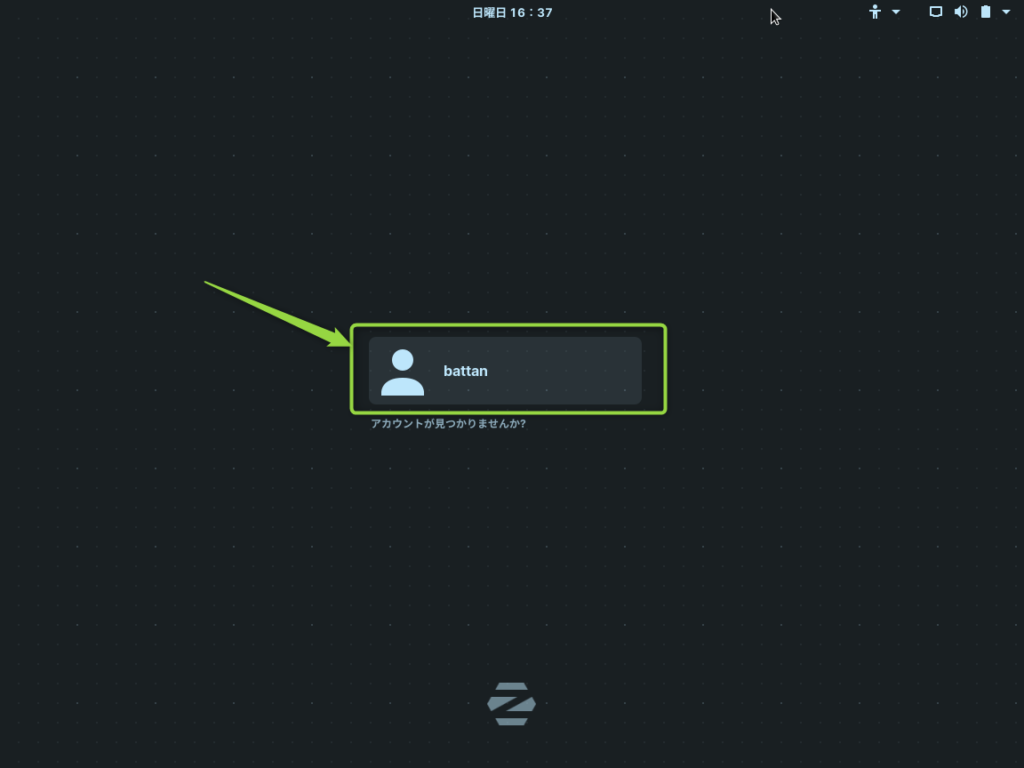
再起動すると、ログイン画面が表示されますので、ログインします。先程自動ログインを選択した場合はこの画面は表示されません。
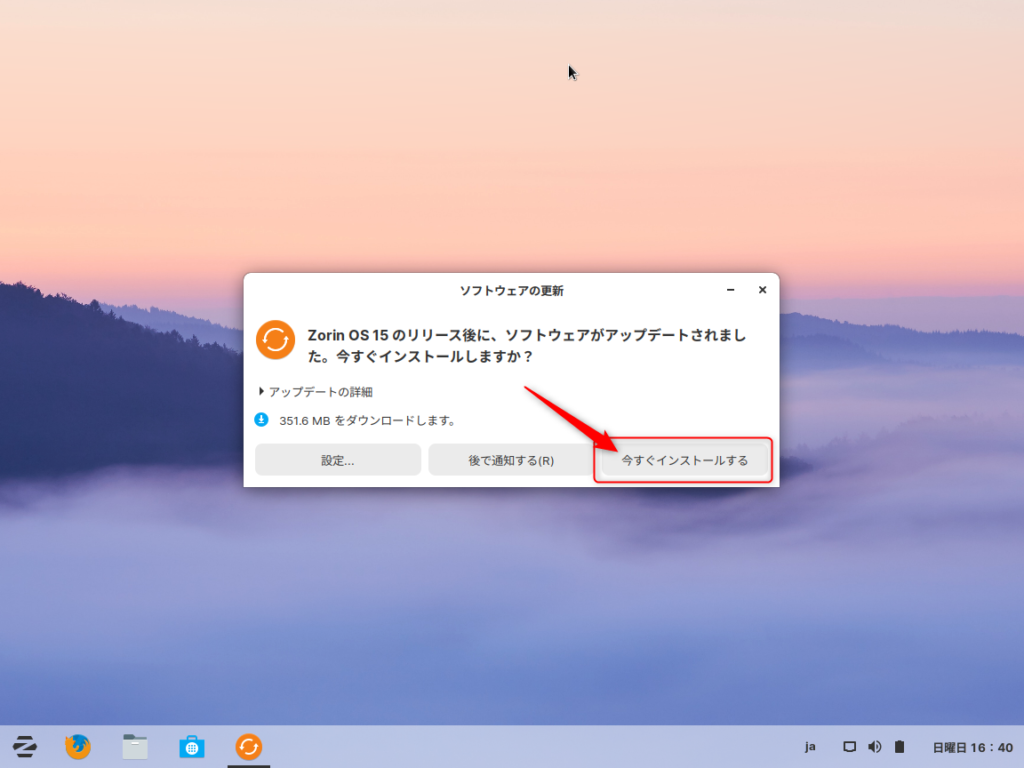
最新状態に更新するため、「今すぐインストールする」をクリックします。
認証を求められたら、入力してください。
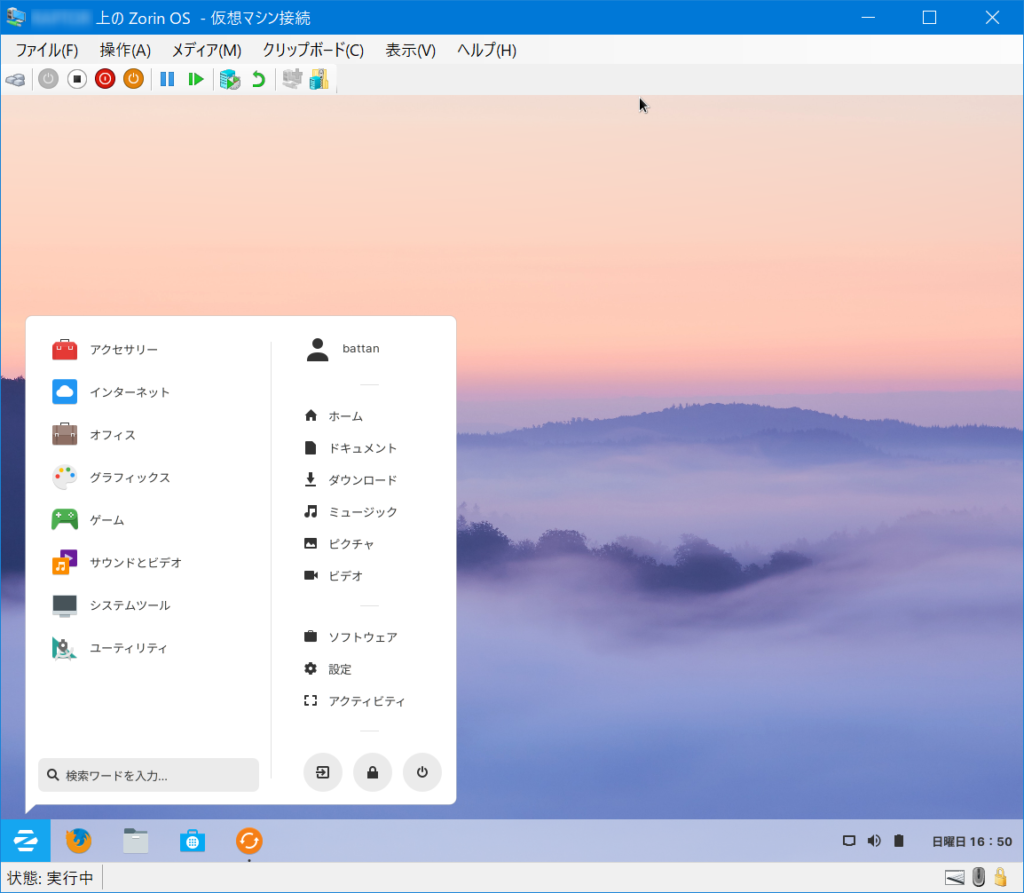
おおおっ! Zorin OSのセットアップが完了しました。
左下がスタートメニューです。Windowsっぽい画面構成ですよね。Windowsユーザでもすんなり使えそうです。
ZorinOSをWindows7っぽくする
せっかくWindows7にUIが似ていますので、この際、もっと似せていきましょう。

コメント